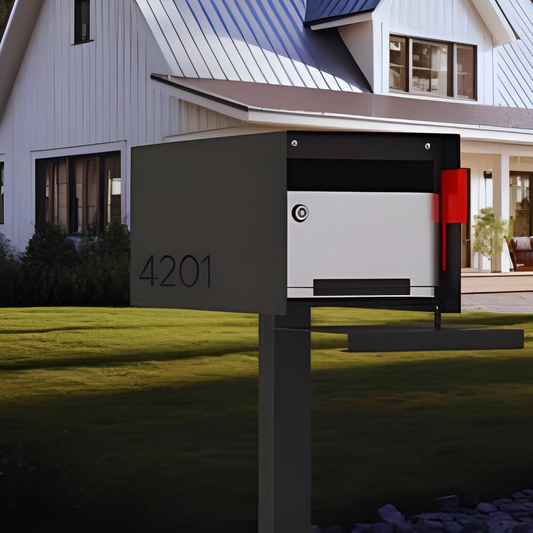
Mailbox post plans start with a simple goal: create a sturdy, good-looking stand that keeps your mail secure while complementing today’s clean, modern mailbox designs. In this step-by-step guide to both 4x4 mailbox post plans and 4x6 mailbox post plans, you’ll learn how to read basic mailbox blueprints, choose the right lumber, and build a post that meets USPS height and setback rules. Whether you’re browsing minimalist powder-coated boxes in our Modern Mailbox with Post buyers’ guide or just need to know how to make a mailbox stand that lasts, we’ll walk you through every cut, bolt, and bag of concrete—so you finish with a rock-solid result that looks right at home beside a contemporary curb.
Key Takeaways
- Choose the right size post for your mailbox: 4x4 or 4x6.
- Gather all necessary materials before starting the project.
- Measure twice, cut once to ensure accuracy in your cuts.
- Secure the post properly to withstand weather conditions.
- Customize your mailbox post design to match your home’s style.
DIY Mailbox Post Plans

A great mailbox stand does two jobs at once: it protects your daily deliveries and frames your home with a dose of personality. Instead of settling for a wobbly kit from the hardware aisle, you can start with a pressure-treated 4x4 or 4x6 core and end up with a modern statement piece that looks custom—not cookie-cutter. Before we dive into detailed mailbox post plans (and all the cutting diagrams that follow), here’s the big-picture context and the few essentials you’ll want on hand.
First, gather your materials. Here’s a basic list to get you started:
- 4x4 wooden post (usually 6–8 feet long, depending on regulations).
- A mailbox.
- Concrete mix for setting the post.
- Fasteners (screws, nails, etc.).
Next, gather tools:
- Shovel or post hole digger
- Level
- Measuring tape
- Saw (circular or hand saw)
- Drill
That’s it. With these staples, you can choose any of the styles we’ll cover next—from slim black minimalist posts to chunkier parcel-box columns—and still stay within USPS height and setback rules. With the core materials and tools sorted, it’s time to turn that 4x4 or 4x6 into a level, code-compliant stand.
Learn more about building a DIY Mailbox
4x4 Mailbox Post Plans
A 4x4 pressure-treated post is the simplest way to get a solid, good-looking mailbox stand. The size is easy to find at any home center, light enough to handle alone, and strong enough for most curbside or small locking boxes. Start with an eight-foot length so you can sink about two feet in the ground and still land the mailbox 41–45 inches above the road surface, which is the USPS standard.
Because the post’s lower end will live in damp soil, pressure-treated lumber is essential. Untreated pine rots in a couple of seasons. Set the post in a single bag of fast-setting concrete:
- Tamp six inches of gravel into the hole first for drainage.
- Brace the post plumb while the mix firms up.
Once the concrete cures, finish the visible portion however you like: leave the wood natural, paint it matte black or white, or slide on a metal sleeve for crisp edges and durability. A 4x4 also accepts add-ons easily—a support arm, house numbers, or even a narrow planter box—without looking bulky.
Quick reference
- Pressure-treated 4x4 lumber
- Hole depth: ~24 in. plus 6 in. gravel
- Fast-setting concrete: one 60-lb bag
- Finish options: paint, metal sleeve, or cedar wrap
4x6 Mailbox Post Plans
A 4x6 pressure-treated post makes sense for heavier mailboxes—like locking parcel boxes—or when you want a thicker, more architectural profile at the curb. The added width boosts load capacity and gives you more surface area for recessed numbers or lighting.
Because a 4x6 weighs more than a 4x4, plan on a deeper footing and extra concrete:
- Dig to ~30 inches
- Tamp six inches of gravel for drainage
- Set with 80–90 lbs of fast-setting mix
Finish options mirror the 4x4—paint, sleeve, or wood wrap—but the broader face gives you room for bolder contrasts and floating designs.
Quick reference
- Pressure-treated 4x6 lumber
- Hole depth: ~30 in. plus 6 in. gravel
- Fast-setting concrete: 80–90 lbs
- Finish options: paint, metal sleeve, cedar/hardwood wrap
What Are Mailbox Blueprints?
Printable mailbox blueprints are widely available online. These one- or two-page PDFs include a scaled diagram, material list, and step-by-step notes, so you know every cut length and bolt size before you start digging.
- Cutaway view with post height, embed depth, and bracket locations
- Shopping list for lumber, concrete, and hardware
- Assembly steps in order, from tamping gravel to tightening the last bolt
Finishing and Upgrading a New Mailbox Post
After the concrete sets, most homeowners shift focus to finishes that protect the core and match their home’s style. Four common options:
Painted or Solid-Color Wood
Sand, prime, and apply two coats of exterior paint or stain. Inexpensive, flexible, and easy to touch up, but expect to repaint every 3–5 years.
Powder-Coated Metal Sleeve
A steel or aluminum shell slides over the post for crisp edges and a maintenance-free look. Blocks sun and moisture, but costs more and is heavier to install.
Cedar or Hardwood Wrap
Fastened vertical slats add warmth. Clear oil or stains enhance the look but require yearly re-oiling. Best for custom, natural accents.
Stone or Brick Veneer Base
Mortared slips around the lower 18–24 in. create a pier-like effect. Priciest option but very durable and architectural.
Check out these Mid Century Modern Mailbox Ideas
How to Decide
- Match maintenance: Paint requires upkeep; a sleeve is long-lasting but pricier.
- Echo the mailbox and façade: Metal sleeves pair with modern boxes; cedar softens dark exteriors.
- Balance profile with load: Heavier boxes benefit from a 4x6 core and sleeve; lighter boxes look fine on a 4x4.
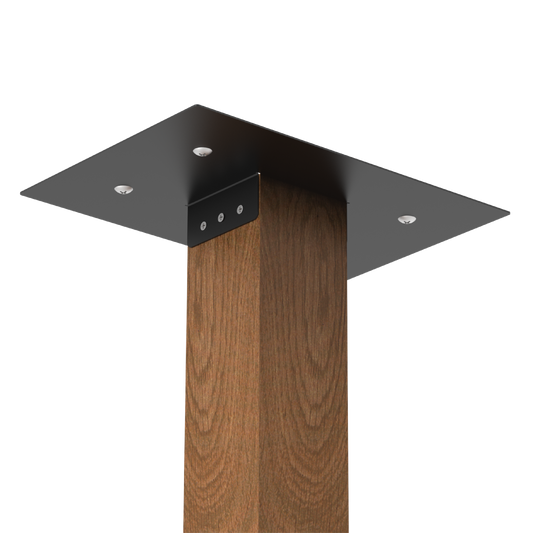
Secure Mounting Hardware

For a 4x4, the cleanest way to mount your mailbox is with a bracket. The Olio Home 4x4 Bracket for Wood Post includes pre-aligned holes and a powder-coated finish.
Prefer an all-metal solution? The Thompson In-Ground Post is a fully welded steel column that eliminates the need for wood. It’s ideal for maximum rigidity and heavy boxes.
Either option pairs seamlessly with the plans above, so you can go from digging the footing to mounting the box without guesswork.